Category Archives: Blog
Blog
How to Make Fridge Magnets from Your Photos
Posted on August 1, 2025
Photos pile up fast. After birthdays, holidays, random weekend stuff, they just stay stuck in your phone. Most of ’em never see daylight. No prints, no albums, nothing.
So why not turn a few into something real? Something you can actually see? Learning how to make fridge magnets from your photos brings those memories out in the open. These little keepsakes do more than decorate, they tell your story.
Every time you open the fridge, there's a reminder of good times, funny faces, and those tiny snapshots.
And the best part? You don’t need a pro setup. Just a few tools, a printer, and some creative energy, and you're all set. Making photo magnets is affordable, fun, and a perfect way to personalize your home. And honestly, a lot more satisfying.
Supplies You’ll Need
To make your own custom photo magnets, you don’t need anything too fancy. Most of the stuff, you probably already have lying around.
- Printable photo paper or photo-quality magnetic sheets – These are your base. You can choose between printing on regular photo paper and sticking a magnet on the back or going for magnetic sheets that already handle both.
- Adhesive magnet sheets – If you're using regular paper, these peel-and-stick sheets will make your photo stick to metal surfaces.
- Scissors or a paper cutter – Clean cuts make all the difference.
- A good printer – Doesn’t matter if it’s inkjet or laser, as long as it prints color and doesn’t mess up your photo quality.
- Photo editing tool – Free ones like Canva work great. Adjust, crop, and get creative. You can also find amazing printable templates at Photo Magnets by Adam.
- Optional: lamination sheets – Want them to last longer, resist spills and wear? Laminate 'em.
Got all that? Cool, let's get to the real part.
Step-by-Guide to Making Fridge Magnets
1 – Choose & Edit Your Photos
Start by picking the photos you want to use. You can make a bunch or just one, doesn’t matter.
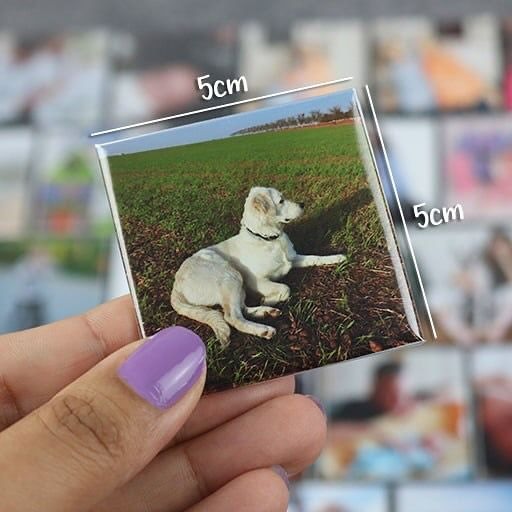
Ideal sizes: 2x2 or 2.5x2.5 inches. These fit well on most fridges and don’t cover too much space.
Pop into Canva or your favorite editor. Brighten things up, maybe sharpen the contrast. Sometimes phones take dark pictures indoors, it helps to tweak that before printing. Wanna add text? Maybe a birthday or inside joke? Go for it.
Tip: Cropping tools are your best friends here. Keep the framing tight.
2 – Print Your Images
Now for the fun part. Print those edited pics.
If you’re using printable magnet paper, make sure it’s compatible with your printer. Some magnet papers are thick, so don’t force it. Always check your printer settings, use "photo" or "best quality" for nice, vibrant colors.
Printing on photo paper instead? No problem. Just stick adhesive magnet sheets to the back once it’s dry.
Here's a side-by-side:
- Magnetic paper – One-solution, a little pricier.
- Photo paper + adhesive magnet – Cheaper, more flexibility
Either works. It’s just about what you got and what you want.
3 – Cut to Size
After the photos are printed, trim them down. Use a paper cutter if you have one, it keeps those edges sharp and neat. If not, scissors will do just fine.
Pro tip: A ruler helps when you're drawing lines to cut. Don't eyeball it unless you're into that slightly chaotic vibe.
4 – Apply Magnetic Backing
Time to make it stick, literally.
If you’re using adhesive magnet sheets, peel the backing slowly. Line it up with your photo and press it down. Smooth it out to avoid bubbles or wrinkles.
And if you're feeling fancy? Add lamination. This extra layer protects the print and gives it a bit of shine. Just remember to laminate before applying the magnet, or it won’t hold.
Boom. You're done.
Design Tips for Better-Looking Magnets
Here’s how to take your fridge magnet game to the next level:
- Use high-resolution images – Blurry doesn’t look cute on the fridge.
- Avoid edge-to-edge printing – Leave a little margin. It helps with trimming and gives a nice border.
- Keep sizes consistent – If you’re making a set, it looks cleaner when they match.
And hey, don’t overload it. Sometimes a simple smile and a bright background say more than a cluttered collage.
Alternative Ideas for Fridge Photo Magnets
Want to try something a little different? Here are a few crafty twists on the usual method.
- Mod Podge + ceramic tiles – Print your photo, glue it onto a small tile, and stick a magnet on the back. More durable, artsy vibe.
- Bottle cap photo magnets – Punch a mini photo circle, glue it inside a bottle cap, and add a magnet. Super cute and tiny.
- Resin-coated magnets – For the crafty pros out there. Pour clear resin over your photo and let it cure. Looks super professional.
Troubleshooting Tips When Making Photo Magnets
Things don’t always go smooth the first time. Happens. Here's how to fix a few common mess-ups:
- Print came out blurry? Check your photo resolution before printing. Aim for at least 300 DPI. And use “best quality” or “photo” setting on your printer. Fast/draft mode? Nah, skip that.
- Colors look off? Your screen might be brighter than real life. Try printing a small test version first. Then adjust contrast or saturation in your photo editing tool.
- Photo curled after printing? Let it dry fully before applying any magnets or laminate. If it’s on thinner paper, press it under a book for a few hours.
- Magnets not sticking well? Clean the surface first. Oil, moisture, or dust will mess with the adhesive on your adhesive magnet sheets.
FAQs
What kind of printer works best for fridge magnets?
Inkjet printers are usually better for photo quality. But if you’ve got a good laser printer, that’ll work too. Just make sure your magnetic or photo paper is compatible.
Can I use regular photo paper for this project?
Totally. You’ll just need to add the adhesive magnet sheet after printing. It sticks fine, and the photo looks great.
How durable are DIY fridge magnets?
They’ll hold up well on a fridge or file cabinet. If you laminate them or use resin, they’ll last even longer. Without that, they might fade or wrinkle over time, especially in humid kitchens.
Why People Love Fridge Photo Magnets
No lie, there’s something super satisfying about making your own magnets. People love them for a bunch of reasons:
- They’re great gifts – birthdays, holidays, even party favors.
- They’re lightweight and cheap to ship – pop one in an envelope, done.
- They don’t take up space – unlike frames or wall prints.
- They add that personal touch to boring appliances.
- They’re fun to make with kids – even messy ones.
Final Thoughts
Making photo magnets is one of those small projects that actually brings a lot of joy. Every time you open your fridge, boom, there’s your dog’s goofy grin, a vacation sunset, or your kid’s first drawing staring back at you.
It’s easy. It’s budget-friendly. And it’s personal.
You don’t need to be a pro to figure out how to make fridge magnets from your photos. Just a little creativity, some basic tools, and your favorite snapshots.
Want to skip the DIY and just order stunning, high-quality custom ones? We’ve got you.
Get custom photo magnets made with love at Photo Magnets By Adam
Or if you’re feeling crafty, check out our blank magnet materials and printable templates to make your own designs.
ABOUT
At Photo Magnets by Adam, we bring your favorite moments to life, one magnet at a time. Made with love, our photo magnets are perfect for sharing smiles, memories, and little pieces of joy.